By Julien Blervaque and Yannick Castaing, Ubisoft Film and Television- Paris
Between January 2020 and March 2021 we were quite busy at Ubisoft Animation Studio (in-house studio of Ubisoft Film & Television) working on a 70min long special episode of our TV series Rabbids Invasion. This episode is named Rabbids Invasion: Mission to Mars and it will be released at the end of the summer on France Television and on Netflix worldwide in 2022.
We handled the storyboard, previz and editing stages internally while the following steps were done by partners studios: Supamonks, which worked mostly on Blender, Anima for a great part of the animation and Miroslav Pilon studio for the sounds and voices. To facilitate the production the movie was divided into 3 acts of about 23’ each. We chose to use the version 2.83 of Blender because it was a LTS and we needed stability on the project.
The challenge for us – apart from using Blender in this kind of big production for the first time, which was pretty exciting – was to offer to our movie director a very flexible previz environment so that he and the artists could concentrate on the quality and unleash their creativity.
Update 12-jan-22: All add-ons are available now below
- Shot Manager: https://github.com/ubisoft/shotmanager
- Stamp Info: https://github.com/ubisoft/stampinfo
- Mixer: https://github.com/ubisoft/mixer
- Video Tracks (experimental): https://github.com/ubisoft/videotracks
- Asset Bank (archive): https://github.com/ubisoft/assetbank
The production
Yannick Castaing (VFX Supervisor):
Before talking about this special Episode of Rabbid Invasion I want to talk about the incubator team of Ubisoft Film & Televison: we have used Blender for many tests, trailers and small exercises that were made only to convince key people inside our studio, so we had to focused on the creativity more than on the technique.
We had to onboard different people from different backgrounds, and after a few days of training it was easy, even with people less technical, to use Blender for their job. I do believe the best asset of Blender is to be able to break the big wall between 2D and 3D artists and make them work together easily (even if they are using the same tools differently). Furthermore, as a proof that Blender is stronger than ever, the quality of what we made was on the exact same level as other DCCs.
On this Rabbids episode we were a small team in production, mixing skills like storyboarding, layout and look dev: 3 artists were coming from the usual storyboard department and 2 others had a 3D background. The result was so impressive that our broadcaster was amazed when they saw the previz, considering that it was much more immersive than a classic animatic.
But the consequences were bigger than aesthetic and storytelling, because Supamonks, our CG partner, had all the right data about assets, lighting, and space. Even the colorscripter told us that they had their best work experience, because they had low definition assets with pre-lighting giving them a solid base to iterate!
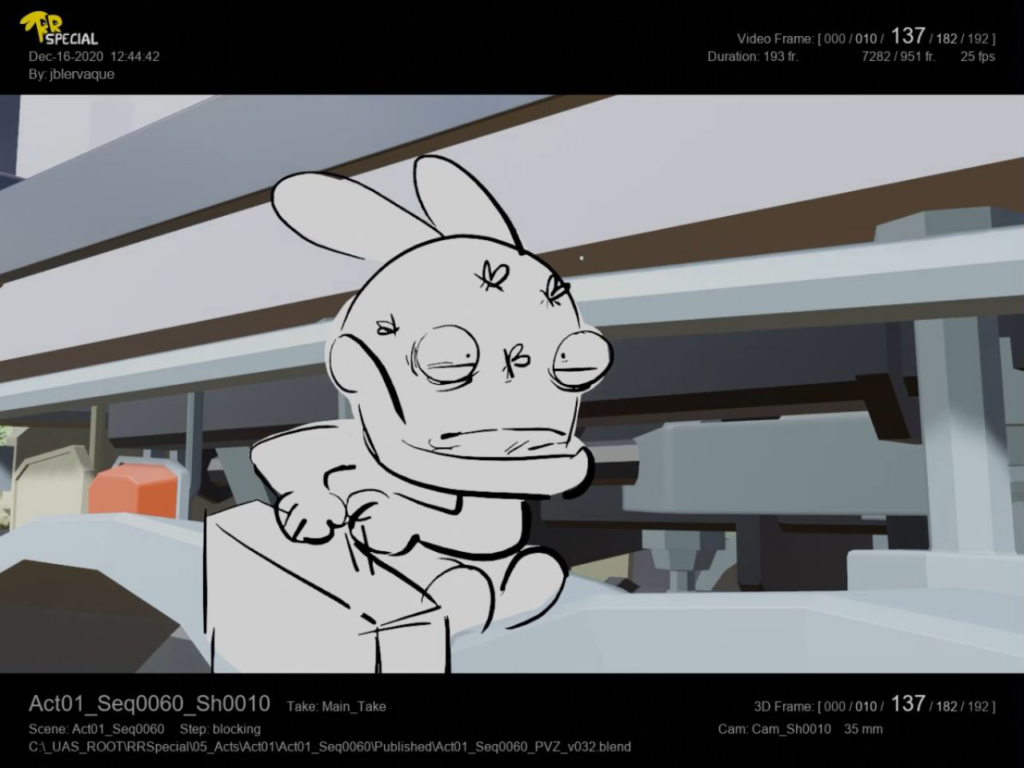
Nevertheless, this organic team suffered from the distance (because of the pandemic), and we had to find solutions in order to work and communicate well. Blender 2.8x in production was a first for some of them and created some aftermath in other steps. This version of Blender changed so many things in the workflow that people had to shift their habits and mindset to embrace it well. The price of mixing 2D and 3D can also be heavy for storyboarders, as everyone ask them to work quickly and effective and we sometimes lost the flexibility of drawings but gained some consistency because of the 3D assets.
Our partner Supamonks was also very interested in using Blender on their side, and with my help, they went from zero to a solid pipeline in a few months which allowed them to make final assets final lighting and rendering on this 70 minutes episode. As a first experience it was a tough challenge that they successfully overcome!
Workflow and tools
Julien Blervaque (Sr. Tools TD, Head of UX):
I was in charge of the graphic workflow and to do so I took inspiration in my experience of live action filmmaking and stages. Thanks to our TD team we designed and developed several tools that quickly became the backbone of our pipeline.
Good news is several of these tools will be released soon to the community!!!
Stamp Info
As you know in production it is mandatory to keep track of the context and origin of every rendered image in order to closely follow the advancement of the project. Blender already has a feature to write metadata on pictures but we needed more flexibility and additional information, such as the frame index of the image in various time systems (3D, edit…). We also wanted to have a more customizable layout. I then started to write my first add-on for Blender ?
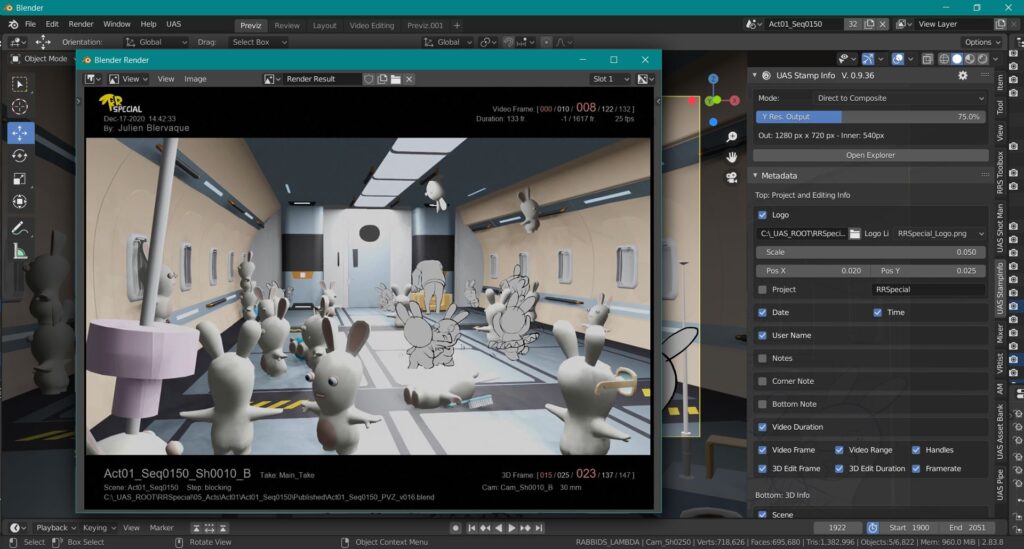
I found the Python API very open and powerful. This allowed me to import Pillow, a common graphic library, to create an image with all the specified information, image that I could combine afterwards with the rendered picture thanks to a process based on the VSE and on the generation of a temporary scene. This got integrated pretty well in the pipeline, it can be used as a standalone tool or be called by script as it is the case with Shot Manager.
However the add-on has an important limitation that we couldn’t overcome when in production. During a rendering script execution the whole UI of Blender is frozen and there is no easy way to display the rendered images, to update a progress bar nor to interrupt the process (in case the images appear invalid for example).
Shot Manager
It quickly appeared to me that in order to let the director experiment and concretize his vision in a short amount of time it was crucial to iterate fast in the way sequences are shot and cut.
To do so I developed an add-on named Shot Manager that introduces a true shot entity in Blender scenes (by shot I mean not only a point of view, which is provided by a camera, but also a recording time) and a wide and powerful set of tools to build and edit sequences in real-time directly in the 3D context.
The key idea lies in the analogy with shooting a continuous live action from several real cameras. That’s why our sequence scenes contain an action with a plausible timing, we then introduce several cameras and the tool defines when the cameras are recording and in which order they appear in the edit. It also provides a play of the shots directly in the viewport, supporting ellipses and jump back in time.
In practice we were able to reach the fast iterations by working on several axes:
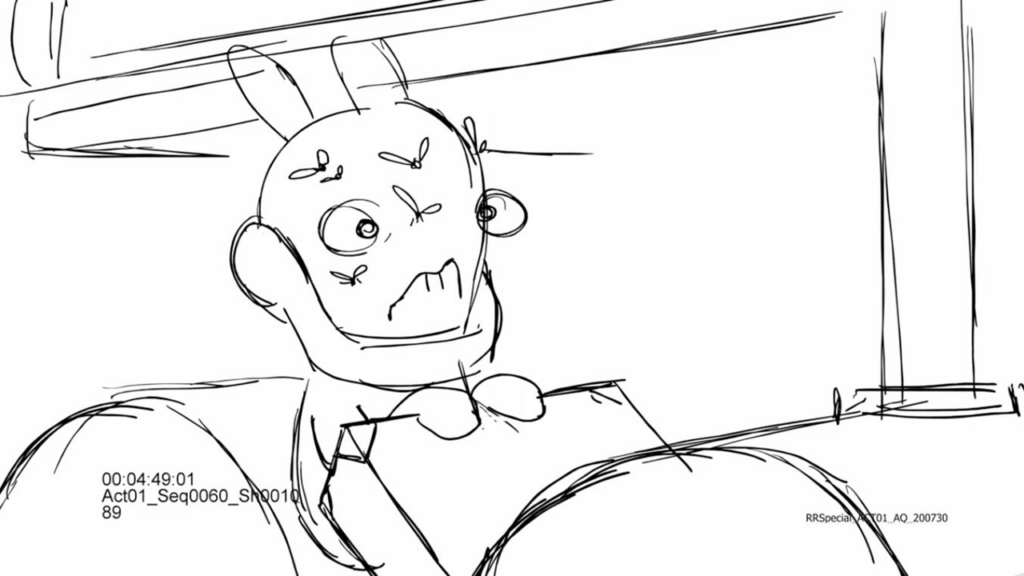
- Spending less time on the storyboard and more time in 3D: The 2D animatic of each act, made in Toon Boom Storyboard Pro, was quite rough in terms of drawings. The director gave a close attention to the timing of the sequences and a pre timing for their shots. The animatic was then exported as an XML and a bunch of videos, one for each shot. Then for each sequence we ran a tool that created a Blender file, merged in the required 3D assets from the bank and read the XML to generate the shots and their associated camera, with the videos as background image. The artists then made the action and start working on the camera placements and shot timings.
- Visualizing the sequences in real-time: Thanks to the playback provided by the tool directly in the viewport the artists and the director were able to immediately view what the sequence was looking like and quickly do modifications. Shot Manager also allowed edit variations to be saved and restored.
Here it is worth saying that we were a bit deceived by the performances of the viewport: Eevee is really efficient and the graphics went well but on the scenes containing a dozen of rigged characters or so, although quite simple for the previz, the framerate was CPU bound and we hardly went over 15fps. We then had to develop a playblast video rendering feature for more accurate visual check.
- Checking the edit of the whole act fast: Once a sequence reached a state that was fine enough for the director its shots were rendered as videos and an edit XML was generated. The director could then load the whole act in the edit software, with the latest version of all the sequences and shots, do some changes in the edit and regenerate the XML. Back into the 3D scene of the sequence Shot Manager was able to update the timing of the shots from the new edit.
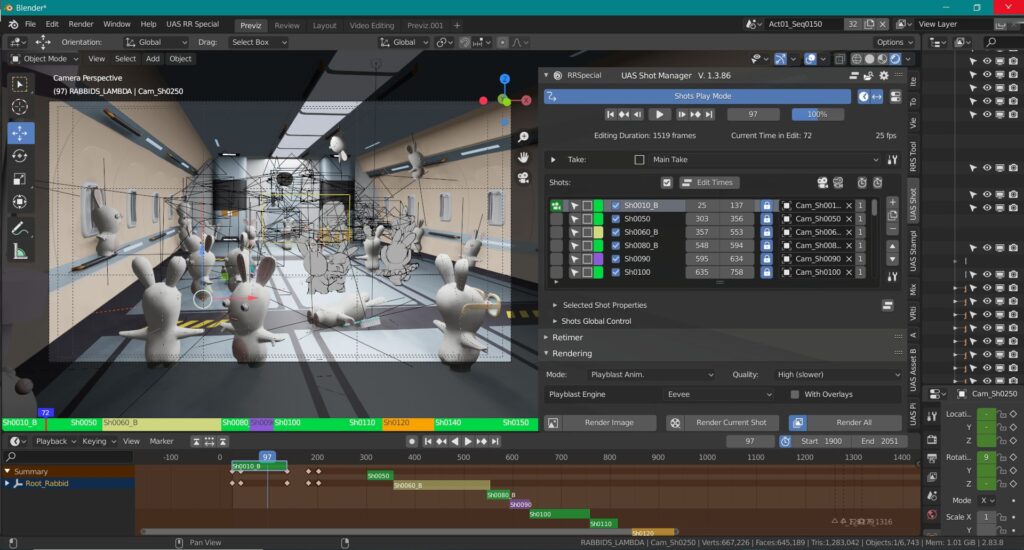
Quick overview of the features of Shot Manager:
- Creation of shots from scene cameras and of sequences from those shots, plus sequence variations
- Non-linear real-time play of the sequences
- Scene action and sequence edit global retime
- Global control on camera video and sound backgrounds
- Sequence batch rendering, with Eevee, Cycle and custom playblast
- EDL import and export based on OpenTimelineIO
- Grease pencil sketching per shot (still in development)
- Edit back and forth with VSE
- …
This add-on received a lot of attention regarding its UX and UI in order to make it as simple to use as possible in spite of the number of features. It will come with documentation and tutorials.
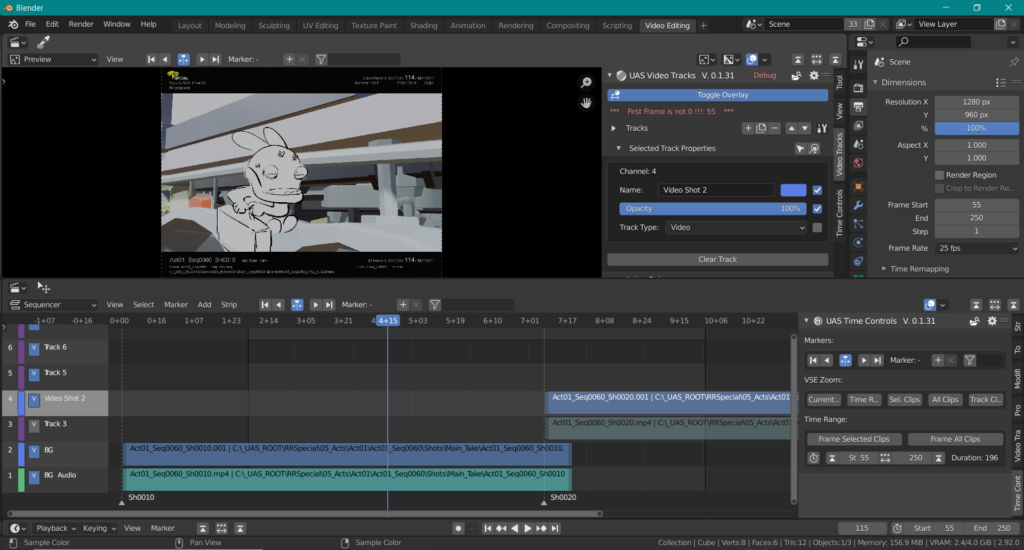
Video Tracks
Having a video editing tool integrated inside the work environment is really appreciated in production. It considerably extents what can be done in the 3D viewport, providing sound support for instance. It is also of a great help for many casual pipeline related actions such as video previews. The Video Sequence Editor appeared a bit limited for our needs though and we thought having a more classical approach of the tracks in terms of UI would make it more efficient for the artists. We then developed this add-on named Video Tracks to introduce a set of track headers and various tools to facilitate the manipulation of time, markers and clips. We used the VSE quite extensively during the second part of the production to compare edits and batch export shot videos with the final voices.
Some of the limitations we bumped into are: no separation between audio and video tracks, the number of tracks is limited to 32, slowdowns to navigate between markers when there are too many, sampling mode of the viewport when the image is zoomed is Nearest, invalid time duration for long MP3… We also regretted that it was not possible to use the output of a VSE as a texture in another scene.
Once this add-on is released I believe it could be used as a good basis for discussions about improvements that could be introduced natively in the VSE.
Asset Bank
Our TD department developed several production specific tools in order to populate the sequence files with the 3D assets of the project. One of them ensured that the assets contained in these sequence files matched with the casting specified in our in-house production tracking tool, called Gattaca. Another one, named Asset Bank, was used to link or import new assets from the bank “on the fly”. It is simple and efficient, and although probably obsolete soon with the asset manager that is about to come natively in Blender it helped us a lot at the time. We will share it as an archive as we believe it could still be of some interest for the community.

Mixer
And of course there is Mixer, our tool for real-time collaboration, to which we gave a lot of attention and which was recently released in version 1.0, with documentation and tutorials. Although not used in practice as extensively as we initially thought because it was not yet production ready, Mixer helped us to validate the concept that work sessions including artists and the director around the same sequence leads to quick and original results.
Adopting Blender in production
Yannick:
Switching to another software is something critical, and many studios are afraid to discover something new and different, because it costs a lot of time and money. Blender is sometimes very different from other DCCs in its mindset and its workflow and as a result people often do not use it at its full potential.
I then personally think that one element can be improved to help onboarding studios. We have so many tutorials by artists for artists (and it’s awesome!), and even in the Blender Cloud, you have a lot of resources about creation or how to use Blender as an artist. However there are almost no specific tutorials and examples about workflows and how it is used in studios, nor best practices regarding links and collections. These are topics Blender Cloud may propose.
Conclusion
This production on Blender was a great experience for us. We were able to integrate the application into our in-house pipeline and connect it to the other applications quite easily thanks to the strength of the Python API. In spite of some features that would need some maturity we had the confirmation that Blender is production ready and comes with tools that can really push up our way of working in terms of creativity.